MadVR with BDRIP Playback
I wrote a basic PotPlayer setup tutorial last year, but with a new monitor in hand this year, it's time to update to use the madVR version. The purpose of this article is to ensure smooth playback of most 24FPS animated videos while configuring madVR in a relatively convenient way, mainly for my laptop's current GTX1070 configuration.
Required Software
Note: The following content may require some "special technology" to download, or you may need to find a domestic alternative source.
PotPlayer
Please go directly to the official website (opens in a new tab) to download the latest x64 version, which at the time of writing is 210929 (1.7.21564).
The only thing you need to pay attention to is to remember to check the box to install additional codecs in the last step.
LAVFilters
Please go to GitHub (opens in a new tab) to download the latest version directly, the version at the time of writing is 0.75.1.
Just check LAV Video Decoder (x64), LAV Audio Decoder (x64) and LAV Splitter Source (x64) during installation.
madVR
Please download the latest version directly from the official website (opens in a new tab), the version at the time of writing is 0.92.17.
Run install.bat as administrator.
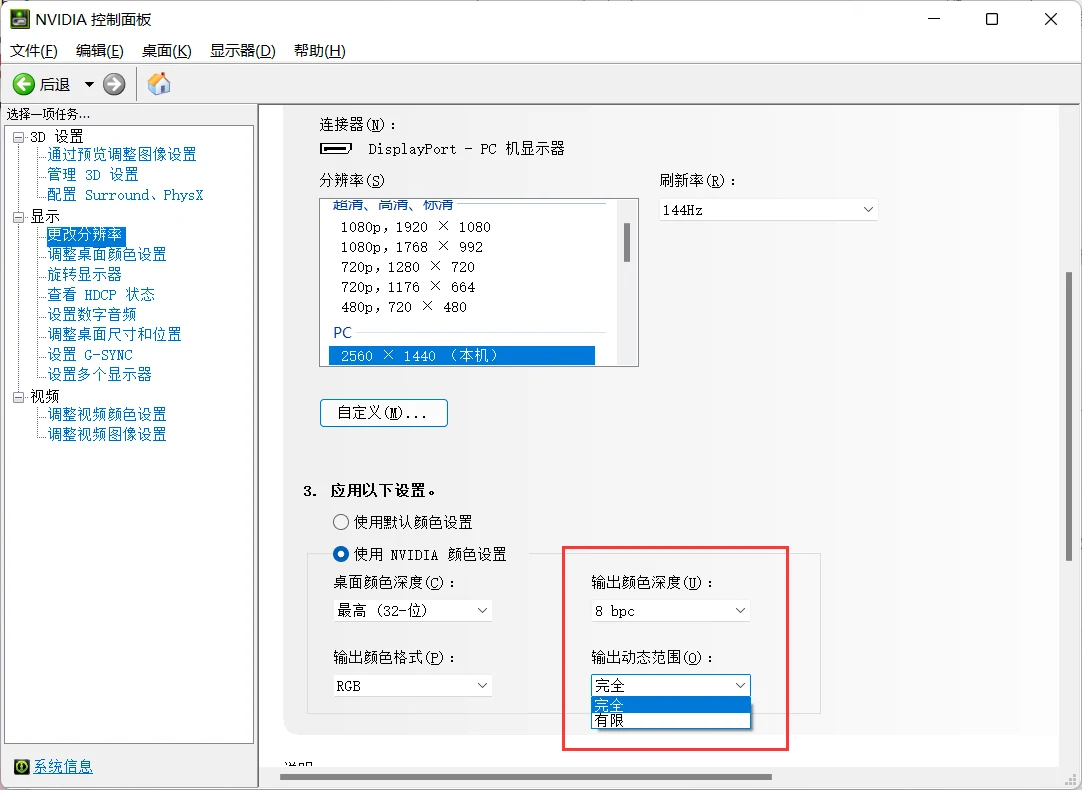
System Settings
Adjust the system video-related dynamic range parameters to full. Take NVIDIA driver as an example, in the "Change resolution" section, adjust the depth to the desired value (the tutorial uses 8bit as an example) and change the dynamic range to "Full"; also change the dynamic range to "Full" in the "Adjust video color settings".

Configure PotPlayer
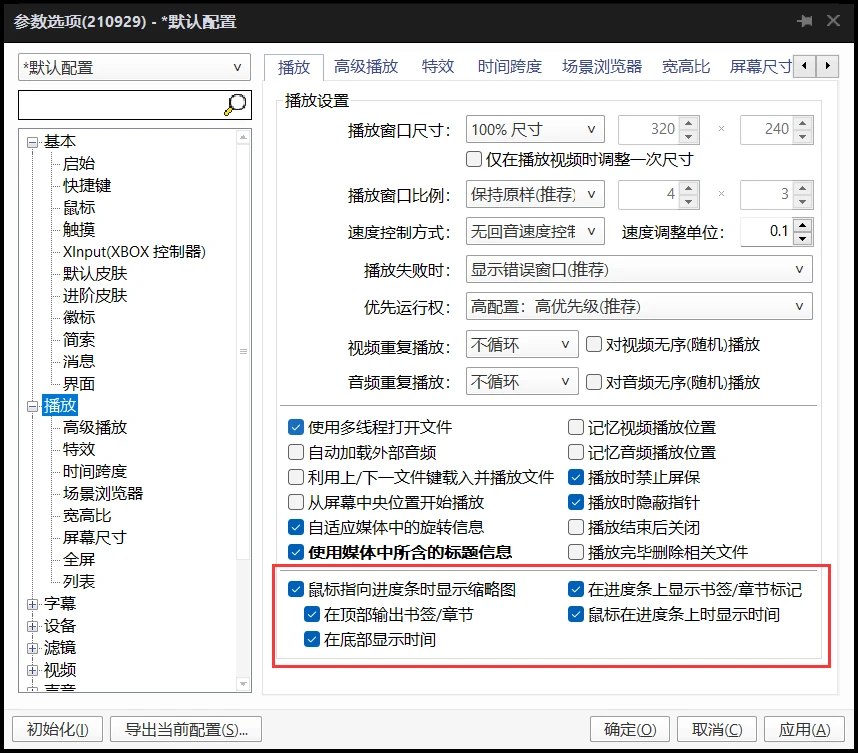
Adjust playback settings
Turn on the progress bar thumbnail in "Playback".
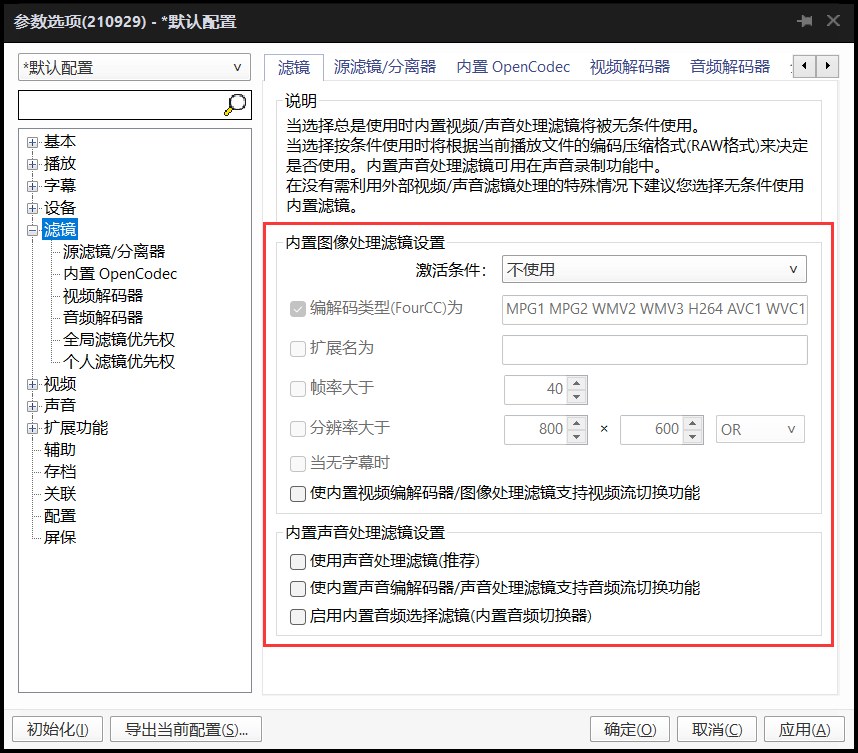
Turn off all built-in image filters
Enable LAVFilters
Switch to "Source Filters/Separators", and click "Add after search" in "Filter/Decoder Management" in the lower right corner, then the searched filters will appear in the left column.
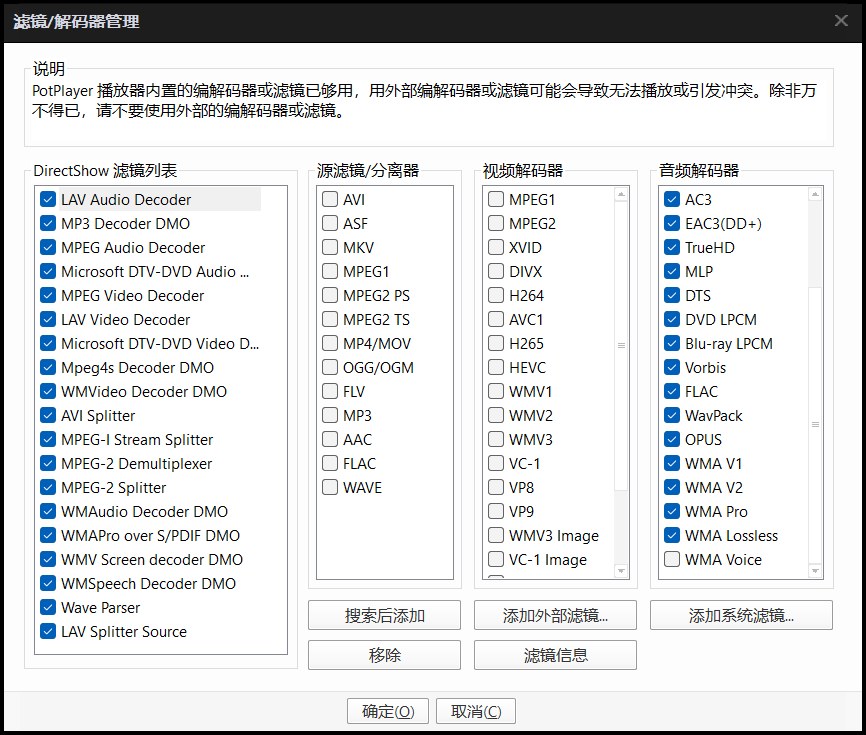
Switch to "LAV Video Decoder" on the left, and check H265 support in "Video Decoder" on the right.
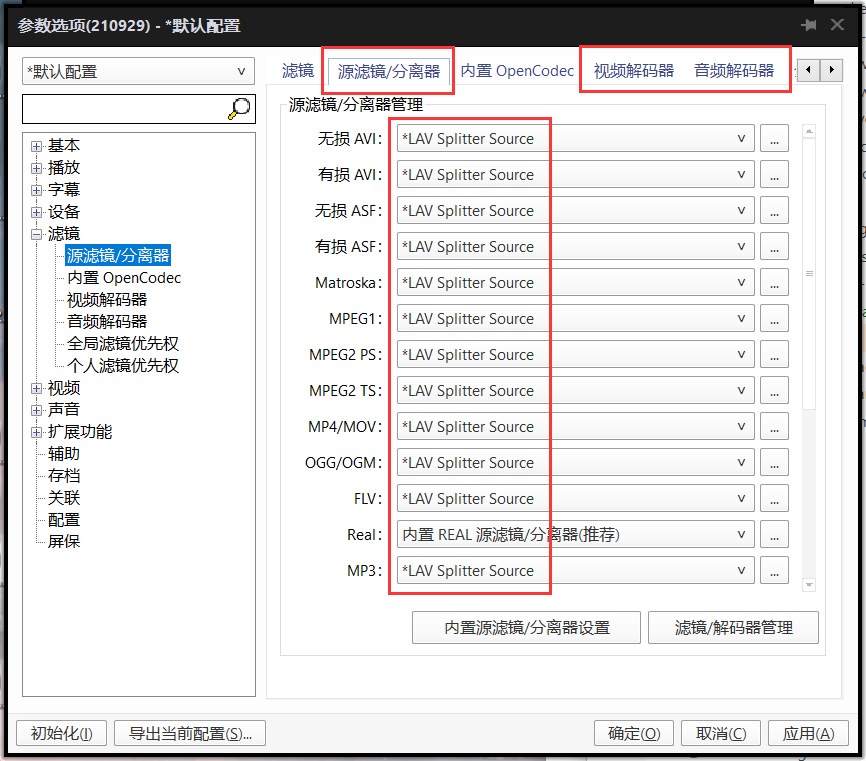
After OK, set all the ones that can be set as "LAV Splitter Source" to it in the "Source Filter/Splitter" as shown below. Similarly, switch to "Video Decoder" and set all the settings to "LAV Video Decoder" and all the settings to "LAV Audio Decoder" in Audio Decoder.
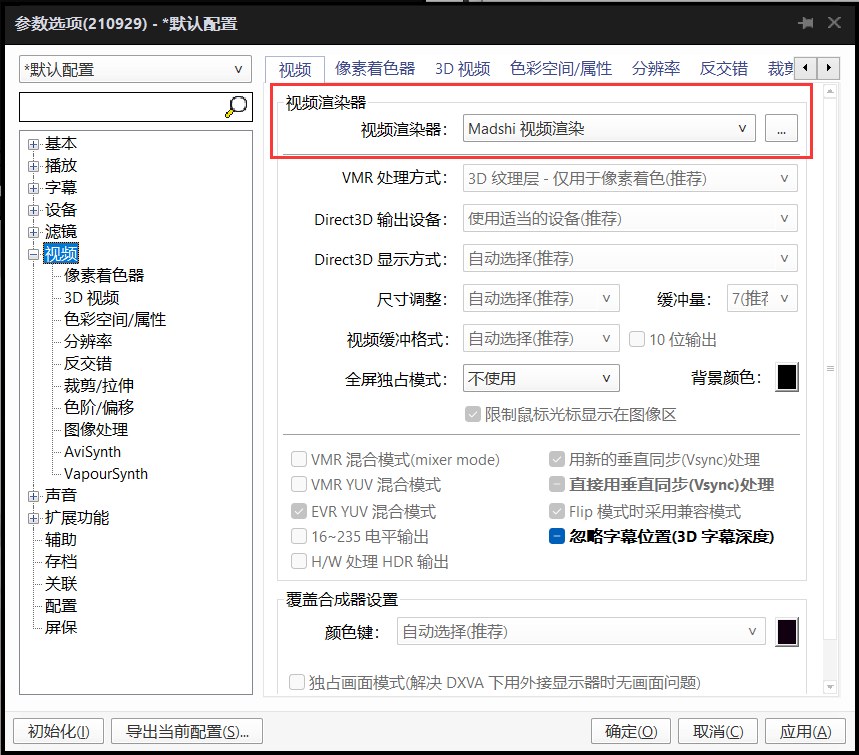
Video rendering settings
Renderer is set to Madshi (madVR).
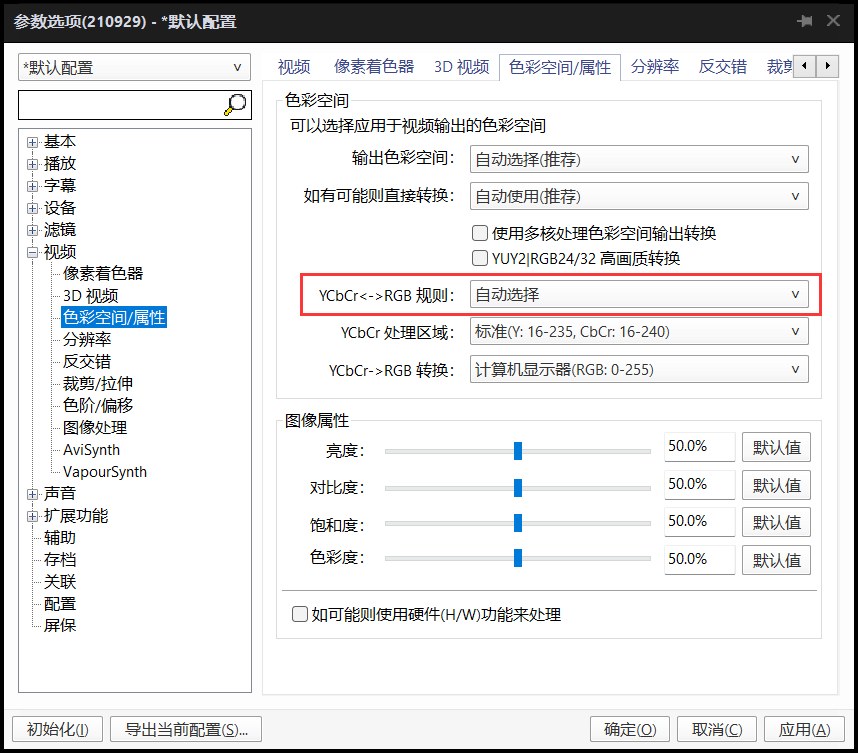
"Color System/Properties" tab, set YCbCr<->RGB rule to be selected automatically.
Audio rendering settings
Audio output is changed to WASAPI renderer.
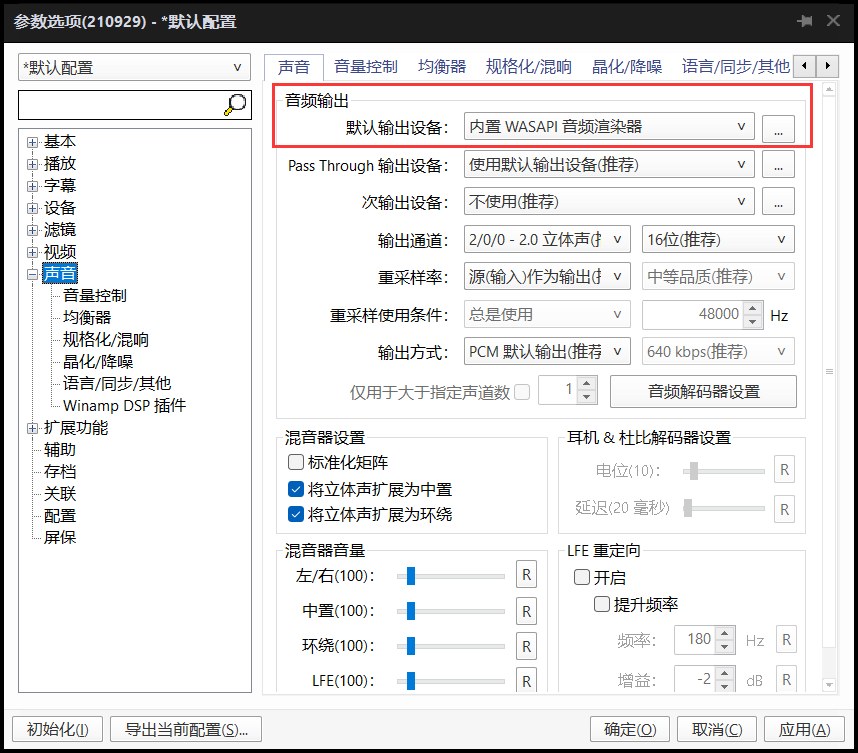
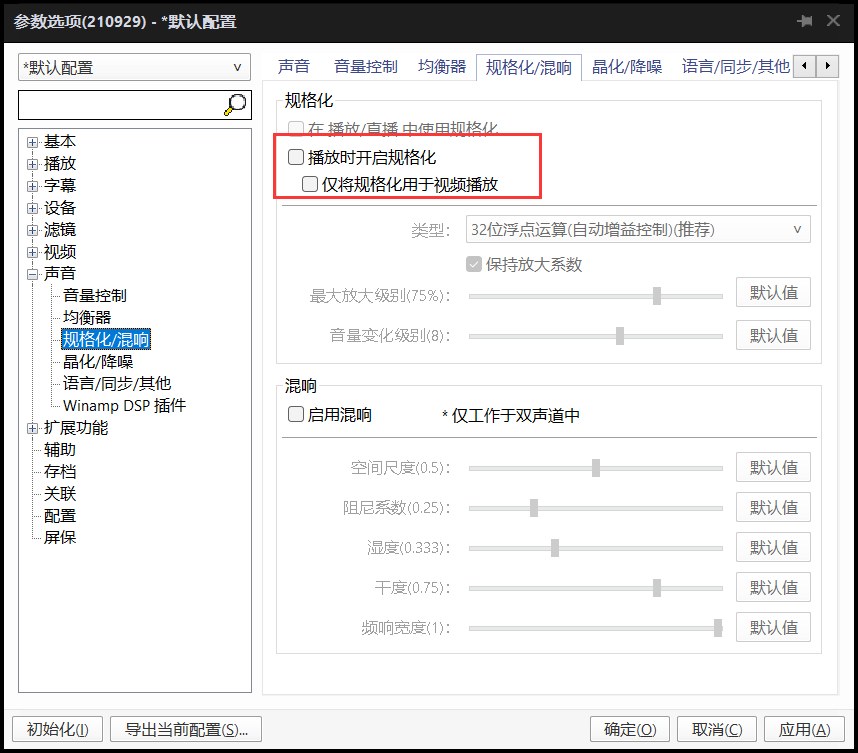
Turn off the formatting that makes the sound extremely unpleasant.
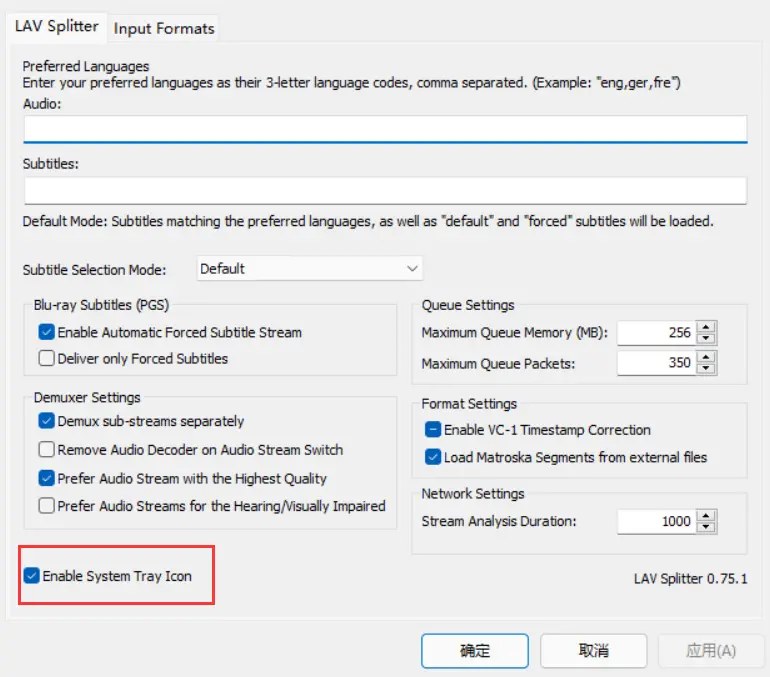
Set LAVFilters
Enter the LAV Splitter Source settings and open the system tray icon for easy switching of audio and video tracks.
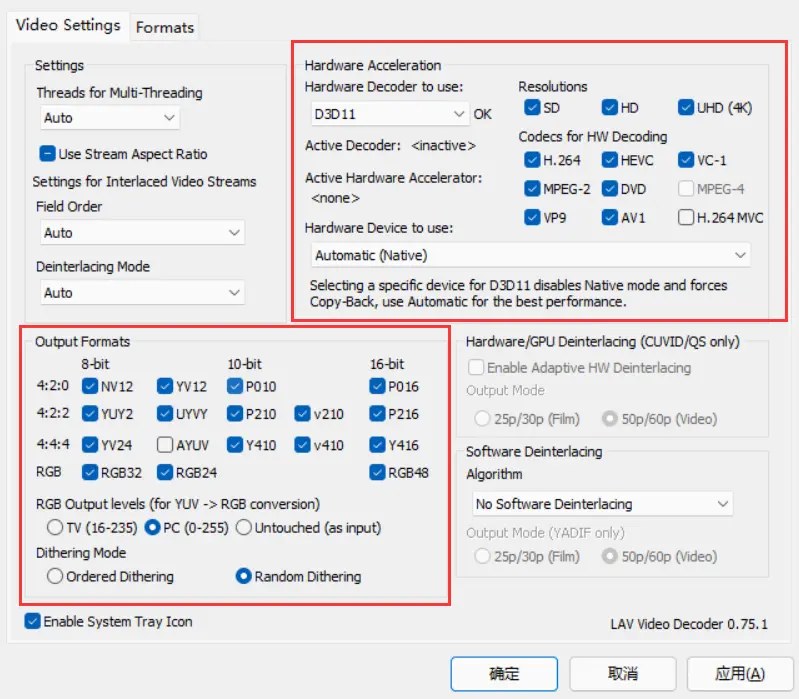
Enter the LAV Video Decoder settings as below, open the system tray and set the corresponding output format, and select D3D11 in the upper right corner of the hardware decoding section.
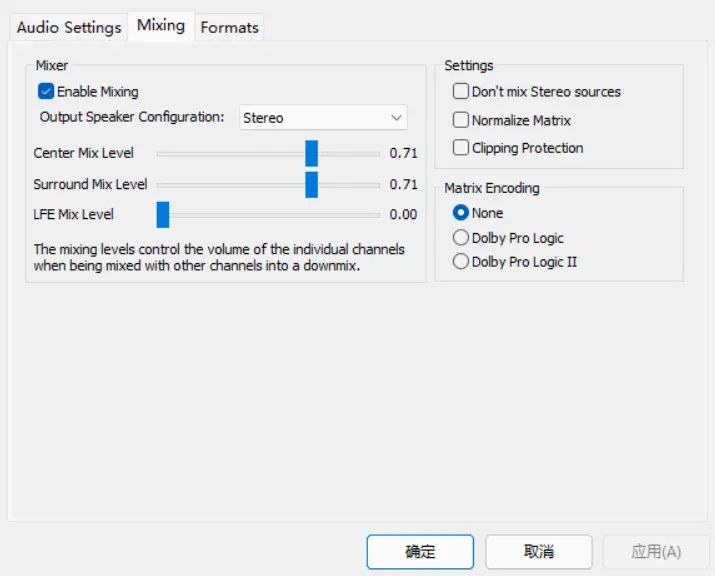
Enter the LAV Audio Decoder settings, again open the tray icon, turn on Mixing, except for physical multi-channel players, and turn off Clipping Protection to avoid any impact on the audio dynamic range.
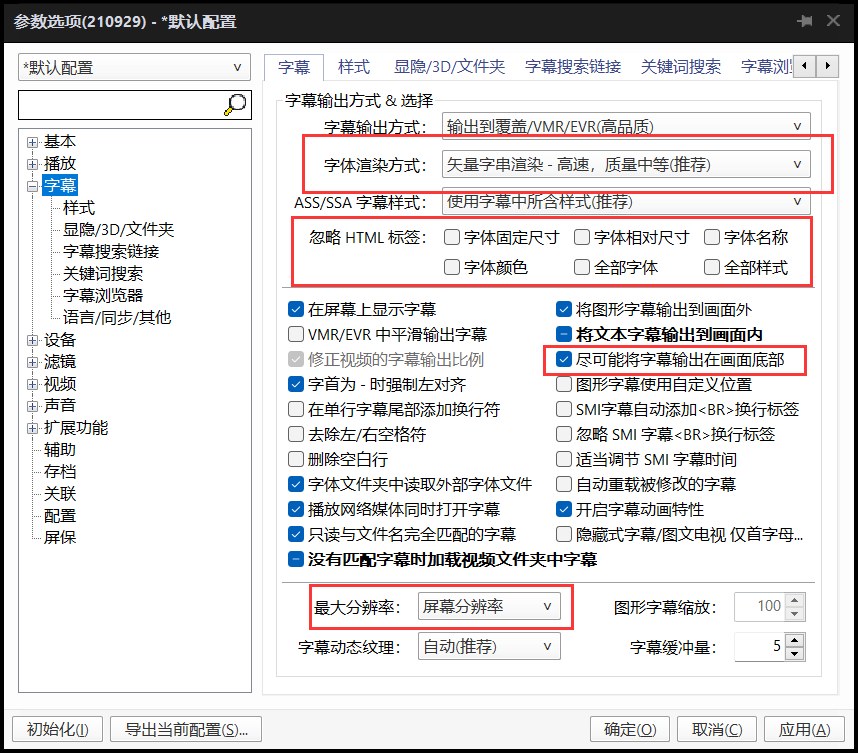
Optimize subtitle rendering
Enter the subtitle settings, set the font rendering method and subtitle style as shown below.
Setting up madVR
This configuration is mainly for the GTX1070 graphics card on 1080P 24FPS video playback in 1080P to 1440P resolution, if other types of video and other lagging problems please adjust the configuration separately.
Details of each configuration can be found in the following two articles (freezer).
- https://zhuanlan.zhihu.com/p/73960527 (opens in a new tab)
- https://zhuanlan.zhihu.com/p/73968849 (opens in a new tab)
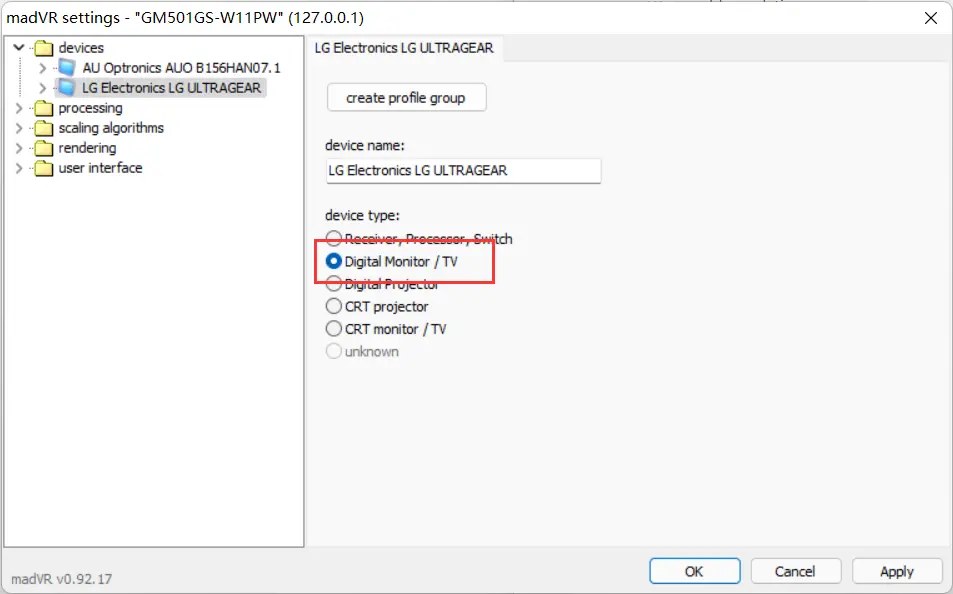
The monitor type is selected as "Digital Monitor".
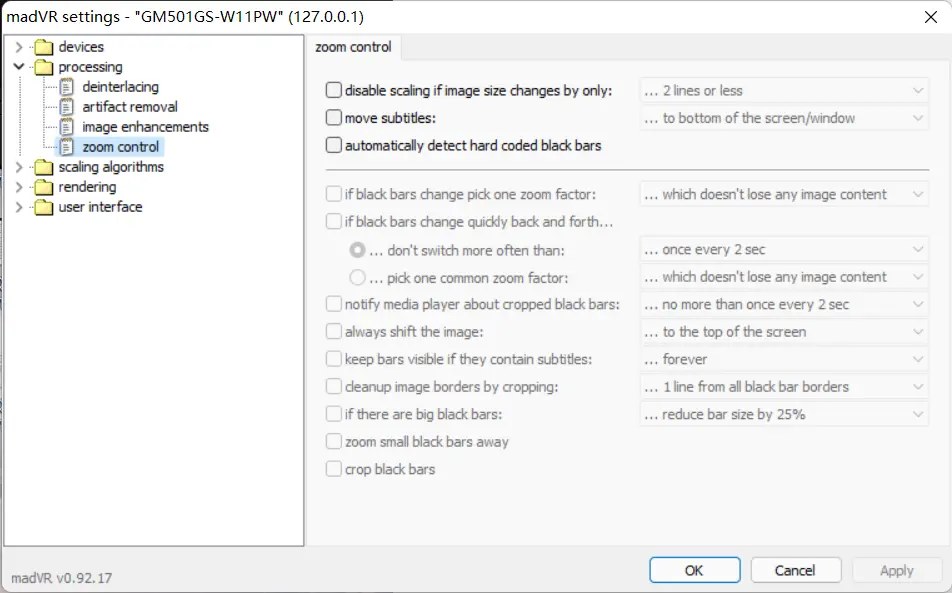
 Clear the scaling setting, check the box depending on your personal situation.
 Chroma upscaling using NGU AA High. screen down using SSIM 1D 100%, enable LL, AR choose relaxed or soft depending on the situation, relaxed will be a little sharper, personally use soft.
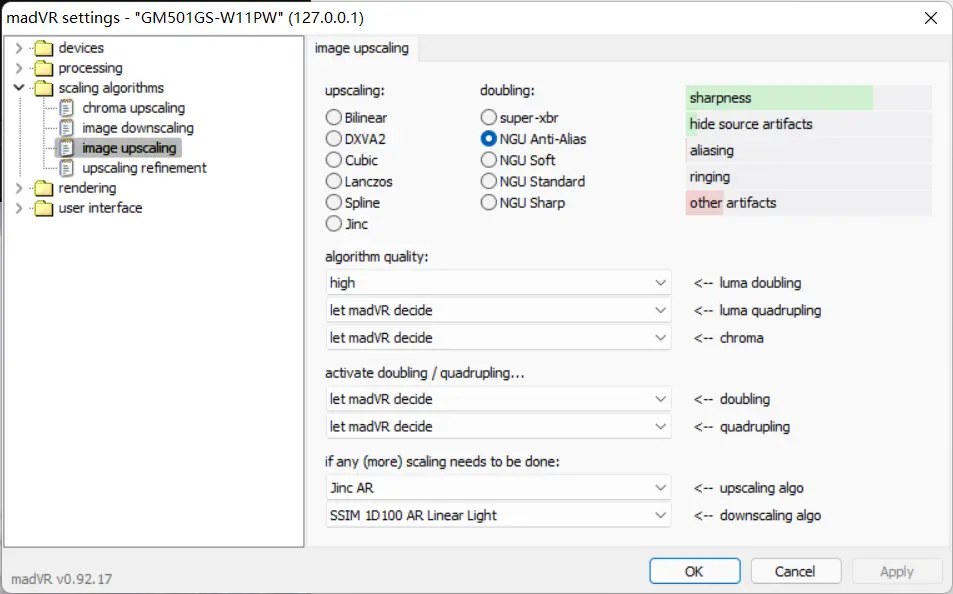
For screen zooming, set doubling to NGU AA, zooming to Jinc AR and zooming to SSIM 1D 100% AR LL when not enabled.
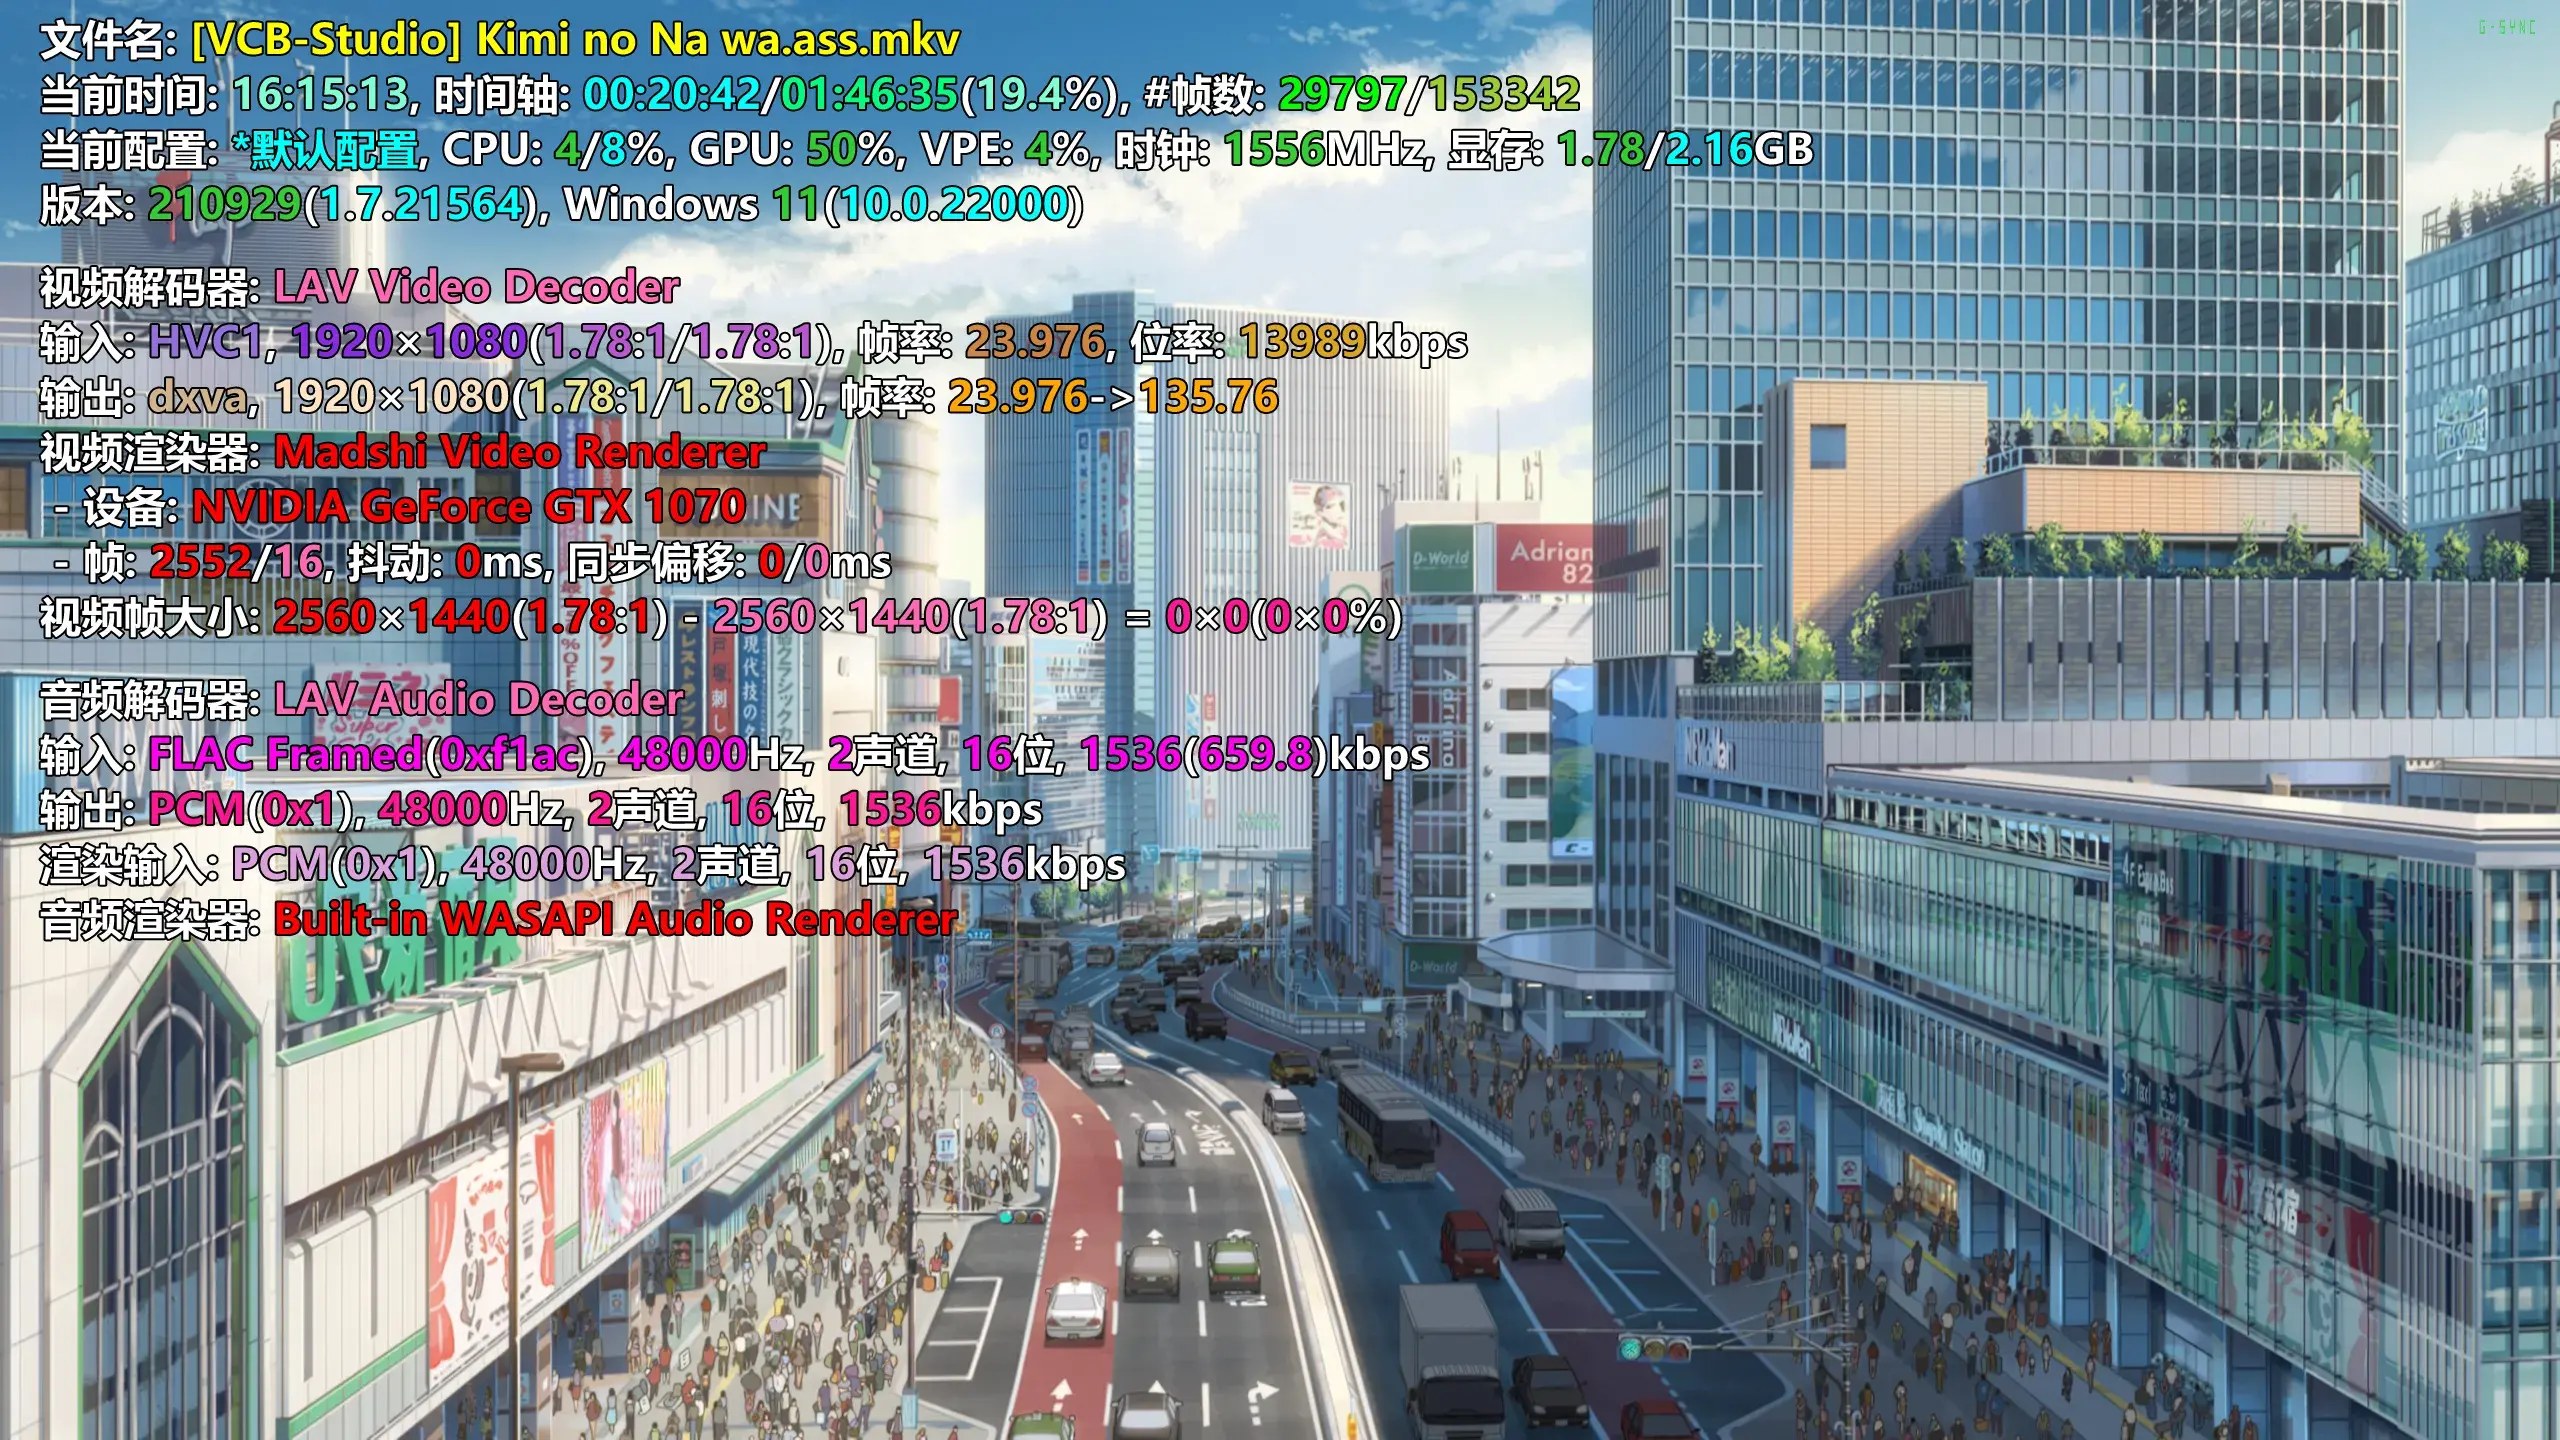
Video test
Up to here, the basic settings have been completed, open the video by Tab key to check whether the normal enable can be. The specific settings may vary depending on your preferences, so please take your time to adjust them according to your own preferences.
Please adjust it according to your preference.